How to start with the Dropship Tool and WooCommerce
Before you start
Before you can start using the Dropship Tool you need an account at one of our partner suppliers. This is needed to select the products for the import to your webshop. You can find more info and a sign-up form on these pages:
The steps to setup the Dropship Tool
- Link your TWM account to the portal
- Select the desired products to import
- Set categories and prices for your selected products
- Install the WordPress plugin your web shop
- Choose your preferred settings for product updates
- Import the products
Link your TWM account to the portal
After logging into the portal you will see a block on your dashboard called Connect your TWM account. Click here on the Enter Credentials button to link your TWM account.
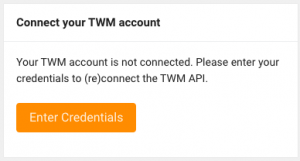
Follow the steps to link your TWM account. During the process a request will be made to TWM to activate the order API.
Select the desired products to import
To view and search the products in the correct language you can select the desired language of the overviews on Product settings page. Choose here between Dutch, German or English.

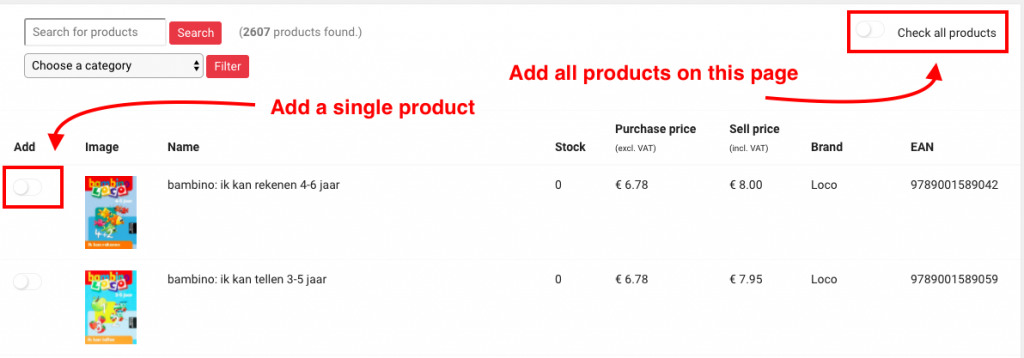
Then use the left menu to go to Add products to select products. On this page you select the minimum stock and one of the sections of TWM. Click on Show products and you will see all products from that section. Next:
- Click on the select button for the product to add only this product to your personal selection; or
- Click on the select button at the top right to add all products on this page to your personal selection.
Set categories and prices for your selected products
When you have selected all products (or the first quantity of products) you can set the categories and prices. You can do this on the Product settings page. The options are listed in this order on the page:
- Change prices
- Changing categories
Once this data has been adjusted, your products are ready to import.
Install the WordPress plugin your webshop
Download the latest version of the WordPress plugin via the dashboard or this link. Install the plugin:
- Login to the wp-admin of your webshop
- Go to plugins
- Click on add new
- Upload the dropship-plugin.zip file
- Activate the plugin
The plugin is active and can be found at the bottom left of the wp-admin menu.
![]()
Choose your preferred settings for product updates
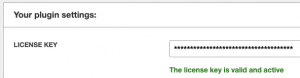
Click on Dropship Tool in the wp-admin menu. Enter your license code and choose the desired settings. Your license code can be found in the portal at My Information.
When your license code has been successfully linked, it will be listed under the code.
Import the products
Finally, the products can be imported.
- Choose the settings for your import on the settings tab and save them.
- Click on the General tab
- Click on import products
The products are now being imported, in small batches, in the background.
Do you have any questions about this explanation?
Leave us a message via the chat support on this website.